Thursday, October 28, 2010

Mingo National Wildlife Refuge Field Trip

 This week we went with a few other homeschooling families to the Mingo National Wildlife Refuge in Puxico, Missouri. With more than 21,000 acres, this refuge is the largest remnant of bottomland hardwoods in S.E. Missouri. In the fall, there is a waterfowl migration that brings a variety of geese, ducks, and other water birds to the marshes of the refuge.

We really enjoyed getting together with other homeschoolers to explore this area. I think Avlyn's favorite thing was the colors and textures of the shelf mushrooms growing on the trees. She also enjoyed kicking up all of the leaves that had gathered on the boardwalk trail

Making new friends was also nice, as she was able to explore with kids she knew and those she'd just met. She got along particularly well with one little boy. Her dad says it's always the boys....:)

 Wel also spotted quite a few animal tracks on our quest. We saw coyote, racoon, and deer tracks. Here she is looking at what we think are deer tracks in a muddy area next to the marsh.
Squashing the prickly berry may have been a high point for her, but wasn't exactly a high point for me. Being that she's 5, baby wipes just aren't something I keep on hand anymore. Thankfully, her outfit and her hands were kind of the same color. We are looking forward to another trip out there with the whole family next spring. I think seeing the refuge in full bloom will be beautiful. If you'd like to explore a refuge in your state, check out the U.S. Fish and Wildlife Service website for a listing of wildlife refuges all over the country. Happy homeschooling!

Tuesday, October 26, 2010

How to Create a Kindergarten Literacy Bag Part II

My first post, How to Create Kindergarten Literacy Bags, explained exactly what a literacy bag is and how to work with one. This post is an example of what we have in our literacy bag for this week. Homeschoolers could probably work through a literacy bag a week, but if you include enough activities you can plan a monthly bag.


The bag we've designated as our literacy bag

We are using the book Literacy Bags as a jumping off point for theme ideas, but most of the activities are things I've researched and found on my own. The theme for our first bag is the letter A and apples.

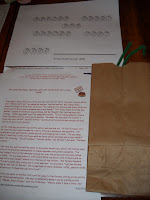
Inside of our bag is one activity for each day. There are two math options included along with the literacy options. The math options include a photocopy of a graph from our Literacy Bags book, along with little tiny apple templates colored red, green, and yellow. The activity is to graph the apples according to color. The other math/art activity is a photocopy of three tree stumps that I found at this stamping blog. I wrote numbers on the trunks and will instruct her to draw three apple trees and then using her fingertip, she will dab on the correct number of apples with red paint.


The literacy activities include copies of our little apple templates found in our book, which I have written beginning consonants on some and word families beginning with A on others. She will match up the beginning consonant with the ending sound to create different words. Some of the ending sounds also coincide with the sight words she's learning, such as an and am. I also printed out a story from The Virtual Vine called The Little Red House with No Doors and No Windows and a Star Inside. This is a storytelling activity that involves cutting open an apple at the end to reveal the star inside the house with no doors or windows. We talked about the story and discussed vocabulary she was unfamiliar with, such as the word orchard.

math graph

I also printed out a story from the Virtual Vine called Apples Yuck and Apples Yum! This is a sight word book of a dozen pages that uses the words I See A ------ Apple. The blanks are then filled in with color words such as blue, red, yellow etc.... followed by the word yuck or yum! She will then draw the apple according to the color mentioned and read the book. The last activity is just a brown paper lunch bag with a green pipe cleaner inside. She will paint the bag red, let it dry, stuff it with paper, and tie it with the pipe cleaner to look like an apple.
stories and craft


The above is just one small example of how you can do a literacy bag. You can include books if you want, but we just pull them off the bookshelf. As we experiment more with these bags over the year, I will post again about our more creative and fun bags. Happy homeschooling!

Monday, October 25, 2010

How to Create Kindergarten Literacy Bags

Kindergarten reading activities should be fun and interactive. I like the idea of a literacy bag, and we successfully use one in our homeschool. I found this great book   at our local book store. It has literacy bag ideas for every letter of the alphabet. I use the ideas as a jumping off point and go from there.

What Is a Literacy Bag?

A literacy bag can be an actual bag, bucket, basket, or whatever container you want to use for the activities. The bag is filled with a thematic unit, with the focus on reading and literacy. In the traditional sense, kids check out the literacy bags from their classroom and explore the activities inside. In our homeschool, I provide enough activities to do one a day.

What Goes Inside the Bag?

 You can put anything you want into the bag. Toys, games, worksheets, crafts, music, poetry, or whatever you want to explore for the week. We are just starting this week with our literacy bag, so we're on the letter A. Inside our bag I have 5-6 activities that follow an apple theme and cover reading, phonics, storytelling, art, and math.

How Do I Teach Using the Bag?

I fill the bag with the activities and have her pick one activity a day. I do not tell her what the activity actually is, as being surprised is part of the fun. For example, one of the things in our bag right now is a brown sandwich bag with a green pipe cleaner in it. It's an art project where she will stuff the bag, paint it red, and add a green stem. Today she chose a two page story out of the bag which involved using a real apple to tell the story, which in turn became our snack after the story.

Tomorrow I will post pictures of our literacy bag and show you examples of what I have in the bag for the letter A apple theme. (Literacy Bags Part II) The literacy bag idea can be tweaked for toddlers or preschoolers just by providing age-appropriate lessons. Older kids also like these bags, as more involved puzzles and games can be put inside for independent learning. Happy homeschooling!

Thursday, October 21, 2010

Easy Halloween Crafts for Kids

 Here are a handful of simple things we've done for Halloween. In the first picture is the baby pumpkins and gourds we grew in our garden this summer. Avlyn simply used a permanent marker to draw faces on the pumpkins, kind of like a faux jack-o-lantern. Hanging out with our faux jacks is our 'W' witch that we made today. Avlyn is already familiar with all of her letters and letter sounds, but we are still working on writing all of the letters correctly.

This witch craft, provided by Craft of the Day, was simple and fun. I always like to show our version of crafts printed on websites or magazines, since I think it gives a more accurate description of what you're going to get at home. Craft of the Day provided the template. I printed it out on white printer paper, cut it out, traced the outline onto green construction paper, cut that out, and then she decorated it. The original instructions call for paper shreds to be used as the broom, but if you've ever tried to glue paper or yarn to a pipe cleaner, you know how frustrating it is to get things to stick. I tried yarn at first, but got aggravated and just cut  two yellow pipe cleaners in half. Then I wound them around the bottom of the red pipe cleaner to make the broom bristles. The pipe cleaner is bent in back and hooked onto the witch. After making this craft we sang Old Mrs. Witch and acted it out with the puppet.


This next picture is our take on an idea from Family Fun . Avlyn found a bunch of acorns at a neighbors house, so we came home and researched something fun and simple to do with them. We found the idea to paint them orange and draw faces on them to make mini jack-o-lanterns. While these are simple, they do take quite a few coats of paint. And the paint ends up chipping quite a bit once dry, as you can see on the unfinished ones to the right. You would need to plan to work on these throughout the day, if you wanted to have them finished by bedtime. For our next batch, we're thinking of trying spray paint instead.

Side note: If doing an acorn craft with a bunch of acorns, make sure to perform the sink or swim test first. Weevil larvae exists in acorns, and if you don't kill them before crafting they can hatch and get out in your house. The whole weevil sink or swim is a great lesson for preschoolers and kindergartners. Fill up your sink about 1/4 full. Drop in the acorns. Those that sink are free of weevil larvae and can be crafted with immediately. Those that float have weevil larvae and should be frozen or boiled to kill the larvae. We put our floaters in a plastic baggie and have had them in the freezer for about 4 days now. They should be good to go. Just to give you an idea of how prevalent weevils are, out of about 50 acorns, only 12 sunk. Happy homeschooling!

Wednesday, October 20, 2010

How to Grow Your Own Loofah (Luffa)


My mother gave me something interesting this spring - a bunch of loofah seeds. Loofah's are those little scrubby things often seen at the stores with a string tied round the top. Most people use them in the shower because they make a great exfoliator. They are as prolific as cucumbers or zucchini when growing, so they make a great homeschool project. (SINCE THIS ISN'T TECHNICALLY A LESSON, I WILL PUT THE WORD LESSON IN PARENTHESES NEXT TO ANY GOOD IDEA FOR USING A LOOFAH TO TEACH) We are still in the process of learning about them, but I thought I'd post on how to grow them so you can order seeds for the spring.

Loofah does great right in the ground, but you can also start them indoors in tiny pots. (LESSON) The one plant we have was started in a peat pot. Honestly, I kept it in the pot too long and will experiment with ground seeding this next spring. However, it has not failed to flourish. (See picture above.) In fact, it started taking over my house. Climbing up the brick wall, strangling out my smaller bushes near it, and attaching itself to my front window screens. Next year, we will make sure we have a large trellis or use our back deck to give it more room to climb. While it can climb up a brick wall, once the loofah begin to grow the weight will rip it from the wall. (LESSON)

Loofah seeds are medium-sized black seeds, and one loofah can give you up to 30 seeds or more. That's why you only need to get your hands on one to have enough seeds to last a lifetime.

It will take a few weeks before your vine grows strong and healthy. Once it does, it will start to branch out and need quite a bit of trellis support. Unfortunately, ours is only supported a few feet, so most of it is lying on the ground. We will fix that next year. Once it starts to grow, you will see little green cluster buds start to form. Those clusters will bloom into pretty yellow flowers that attract a ton of bees for pollination. (LESSON) Once the flowers dry up, a baby loofah will begin to grow. When they first start out, they resemble a certain part of the male anatomy. (POSSIBLE LESSON?) If you notice these all over your vine, you're going to have a great harvest. Here's a pic that shows cluster buds, a flower, and the baby loofah:


Our plant has been in the ground since mid-August, and we noticed our first flowers and baby loofahs about 3 weeks after transplanting it. The loofahs we currently have on the vine look like this:


As you can see, they look very much like a cucumber. I have read a variety of advice about harvesting these vegetables. Most say to wait until the loofah is brown or yellow and dried out. This means the fibers inside have dried out and you can peel it, lay it in the sun for a day, and use it. There are people who say you can pick them green, especially if you notice that they're beginning to get ground rot or mildew, and let them dry out on your porch. Others say you can pick and peel them green, but you will need to milk the loofah before it will begin to dry out. (INTERESTING LESSON) The only method we've done is to peel a dried loofah. The skin is crusty and peels away in chunks and flakes. We shook out the seeds and this is what we had left:


I personally don't care for the earthy smell of it, but I do like to cut it into chunks and use it as a dish scrubber. We are going to keep our loofah vine until the first frost kills it. I'll post an update about our harvesting/milking/peeling/drying methods then. I hope you've enjoyed this interesting vegetable and will consider planting one just for the fun learning experience. Happy Homeschooling!

Monday, October 11, 2010

Have You Been Boo'd? Teaching with Halloween Boo Grams


Halloween is approaching. It's one of our favorite holidays because my husband loves anything scary. My kids are also little zombie-freaks who like a good scare. I'm more of a mediocre scare girl myself, but I still like to decorate for Halloween. This year I learned about Boo Grams. I love fun stuff like this, and I think you can use it to teach your kids about giving and sharing at a time other than Christmas.

Basically you create a boo bag or basket and secretly leave it at a neighbor's house. You can fill your boo gram bag with all sorts of goodies. We haven't begun working on ours, but I'm thinking of putting stickers and other Halloween goodies in for the kids, along with some Halloween sprinkles and a cookie cutter for making some homemade goodies.

Inside your boo gram you put this note:

You've just been boo'd, but you don't know by who. Keep the scaring and sharing going by making up your own boo gram for another friend or neighbor. Drop it on their door and RUN! Happy Halloween.

There are variations to the different notes available for boo grams, and the one above is our own custom gram that we made up ourselves. If your neighborhood has never done this, get started and create a new tradition. Once you do a little scaring and sharing of your own, others will probably join in the fun. I'll post pics of our boo gram process next week. Happy Halloween and Homeschooling!